
Hey there, on this post I’ll be sharing how to set up a custom analytics dashboard with Umami on your own VPS.
Let’s start with some background on why I’m doing this: I’m currently building web apps and servers on a small $5/month VPS—mostly by leveraging AI. Some of these projects are actually getting real users, so naturally I wanted analytics for them. In past mobile projects, I’ve used Google Analytics, which is easy to set up and feature-rich, but this time I wanted something different:
- Self-hosted (no third-party data pipeline, no vendor lock-in)
- Privacy-friendly by default (GDPR compliant)
- Customizable if I ever need to extend it
In theory, I could build an analytics platform from scratch (and with today’s AI tools it’s more feasible than ever), but it’s still a lot of work: data collection, bot filtering, storage, dashboards, auth, and deployments.
So I looked at popular open-source options like Plausible, PostHog, and Umami, which all seem to be pretty good and very popular on github. Umami stood out for me for its simplicity and because it’s built with technologies I’m already comfortable with (Next.js, Prisma, PostgreSQL, TypeScript). That makes it easy to customize later if needed so I went with it.
I figured someone else might want to do the same, so here’s a detailed guide on how to set it up.
What you’ll build
- A self-hosted Umami instance (which is just a Next.js app)
- Accessible via your own domain (for example,
analytics.yourdomain.com) - Tracking enabled on at least one of your apps (a single umami instance can track multiple websites)
Prerequisites
If you want to follow along, you’ll want:
- Node.js (LTS recommended)
pnpm(npm would work fine too)- PostgreSQL (local or remote)
- A VPS with a public IP for production (if not using a VPS, you can use a local database and run the app locally as well)
- Nginx (reverse proxy)
- A domain or subdomain pointing to your server
1) Clone Umami
Umami’s repo is available at: https://github.com/umami-software/umami
We can just clone the original repository and start working from there. But if you want to tweak anything, you can fork it first too. Then install the dependencies and we’re good to go.
git clone https://github.com/umami-software/umami.git
cd umami
pnpm install
2) Configure environment variables
Create a .env file at the project root:
DATABASE_URL=postgresql://umami_user:your_secure_password@localhost:5432/umami
APP_SECRET=a_random_long_string_for_security
Notes:
DATABASE_URLmust point to a valid Postgres database and user. The umami repo has a docker-compose file that can be used to start a postgres database locally, but if you are using a remote database, you can use that instead.APP_SECRETa secure random string, you can generate one withopenssl rand -base64 32
3) Build and run locally
pnpm run build
pnpm start
By default Umami runs on http://localhost:3000.
Default login
- Username:
admin - Password:
umami
Important: Change the admin password immediately after the first login: Settings → Profile.
4) Add your first website
Once logged in:
- Go to Settings → Websites
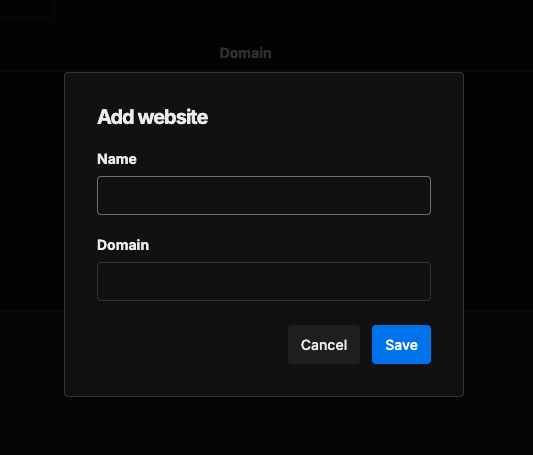
- Click Add website
- Give it a name (example: El Cambio)
- Copy the Website ID
5) Deploy to a VPS with Nginx
On your VPS, you’ll typically repeat the same high-level steps:
- Install dependencies
- Configure
.env - Build the app
- Run it (preferably using a process manager like systemd or pm2)
- Put Nginx in front
Example Nginx config
Create a file like:
/etc/nginx/sites-available/analytics.yourdomain.com
server {
    listen 80;
    server_name analytics.yourdomain.com;

    location / {
        proxy_pass http://localhost:3000;  # the port Umami is running on
        proxy_http_version 1.1;

        proxy_set_header Host $host;

        # WebSocket headers (safe to include)
        proxy_set_header Upgrade $http_upgrade;
        proxy_set_header Connection "upgrade";

        # Important for Umami to see the correct visitor IP/proto
        proxy_set_header X-Real-IP $remote_addr;
        proxy_set_header X-Forwarded-For $proxy_add_x_forwarded_for;
        proxy_set_header X-Forwarded-Proto $scheme;
    }
}
Enable and test:
sudo ln -s /etc/nginx/sites-available/analytics.yourdomain.com /etc/nginx/sites-enabled/
sudo nginx -t
sudo systemctl reload nginx
6) Enable HTTPS with Let’s Encrypt (Certbot)
I would recommend enabling https for your analytics dashboard for security reasons. You can use Let’s Encrypt to get a free SSL certificate.
First, make sure to install Certbot:
sudo apt update
sudo apt install certbot python3-certbot-nginx
Now before generating the certificate you must add an A record in your domain provider pointing analytics.yourdomain.com to your VPS public IP and wait for the DNS to propagate.
Then run the following command to generate the certificate:
sudo certbot --nginx -d analytics.yourdomain.comAt this point, your analytics dashboard should be live at:
https://analytics.yourdomain.com
7) Add the tracking script to your app
Umami tracks pageviews and events via a small script. For integration in your website, add this to your site’s HTML (in the document head):
<script
  async
  src="https://analytics.yourdomain.com/script.js"
  data-website-id="YOUR-WEBSITE-ID">
</script>
Make sure to replace YOUR-WEBSITE-ID with the website ID you copied earlier and that’s it, after deploying you should be able to see your website analytics in the Umami dashboard.
React SPA example (track custom events)
Besides pageviews, you can track custom events (button clicks, signups, conversions) by calling window.umami.track(...) from your React event handlers.
Here’s a simple pattern similar to what I used for tracking currency conversions in El Cambio:
export default function ConvertCurrencyButton({ from, to }) {
  const handleClick = () => {
    // ...run your conversion...

    // Umami exposes window.umami when the script is loaded
    window.umami?.track("convert_currency", { from, to });
  };

  return <button onClick={handleClick}>Convert</button>;
}
You can use this pattern anywhere the action happens (buttons, forms, etc.) and visualize them in the Umami dashboard like this:

Wrap-up
After you finish, you’ll have:
- A self-hosted analytics platform under your control
- A clean dashboard for your apps
- A setup you can extend later because you own the stack and the data